Documenting ASP.NET Core 3.1 API Projects Code-First with NSwag
API documentation is necessary if the API is to be used by other developers in a team or in public (for external APIs). For large and complex projects, documentation can be written before the API is actually implemented (design-first). Platforms such as Swaggerhub are available for collaboration on creating these API documents which conform to the OpenAPI specification.
Code-first approach can also be an option for documentation, that is, the API is implemented first, and the documentation is created after the code is made. This works well for self-managing teams and those who are into extreme programming.
For ASP.NET Core API projects, NSwag offers the ability to automatically generate OpenAPI documents and serve up an interactive Swagger UI from an available codebase.
The HomeBrew Project
We are going to work with a simple project to demonstrate the use of NSwag.
HomeBrew is a mini ReST API made with ASP.NET Core which allows retrieval of available beers from an imaginary beer website. It has two endpoints under a single BeerController, GET /beer/ and GET /beer/{beerId} which fetches all beers or a single beer, respectively.
It does not have any written documentation, yet.
Setting Up NSwag
Add the NSwag package to the project by running the following in the Package Manager Console:
Install-Package NSwag.AspNetCoreAdd and enable the NSwag middleware in Startup.ConfigureServices and Startup.Configure:
public void ConfigureServices(IServiceCollection services)
{
    ...
    services.AddControllers();

    services.AddSwaggerDocument();
}
public void Configure(IApplicationBuilder app, IWebHostEnvironment env)
{
...
app.UseEndpoints(endpoints =>
{
endpoints.MapControllers();
});
app.UseOpenApi();
app.UseSwaggerUi3();
}UseOpenApi() generates the OpenAPI document of the project and UseSwaggerUi3() sets up the Swagger UI around that document. Running the project and navigating to /swagger/v1/swagger.json shows the generated OpenAPI document in JSON format:
{
  "x-generator": "NSwag v13.9.4.0 (NJsonSchema v10.3.1.0 (Newtonsoft.Json v9.0.0.0))",
  "swagger": "2.0",
  "info": {
    "title": "My Title",
    "version": "1.0.0"
  },
  "host": "localhost:5001",
  "schemes": [
    "https"
  ],
  "produces": [
    "text/plain",
    "application/json",
    "text/json"
  ],
  "paths": {
    ...
  }
  ...
}
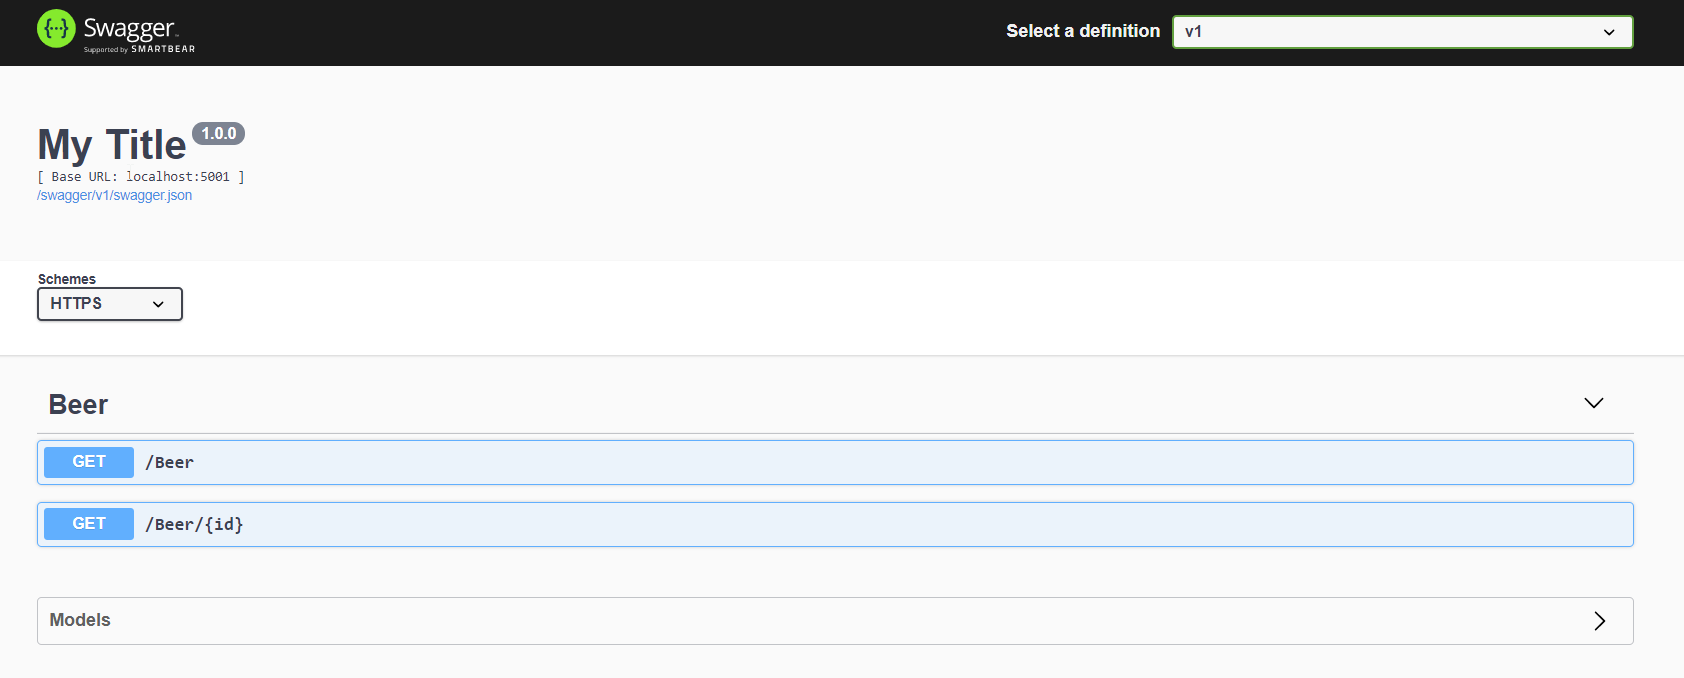
Navigating to /swagger shows the Swagger UI where actual HTTP requests can be made to the HomeBrew API.

Although the Swagger UI we have is already fully interactive, it may not provide a developer-friendly experience since the endpoints’ purpose and their responses are not really described in the UI. This is also apparent in the generated OpenAPI document where fields such as description are not available:
"/Beer/{id}": {
  "get": {
    "tags": [
      "Beer"
    ],
    "operationId": "Beer_GetById",
    "parameters": [
      {
        "type": "integer",
        "name": "id",
        "in": "path",
        "required": true,
        "format": "int32",
        "x-nullable": false
      }
    ],
    "responses": {
      "200": {
        "x-nullable": false,
        "description": "",
        "schema": {
          "$ref": "#/definitions/Beer"
        }
      }
    }
  }
}
Making the Documentation More Descriptive
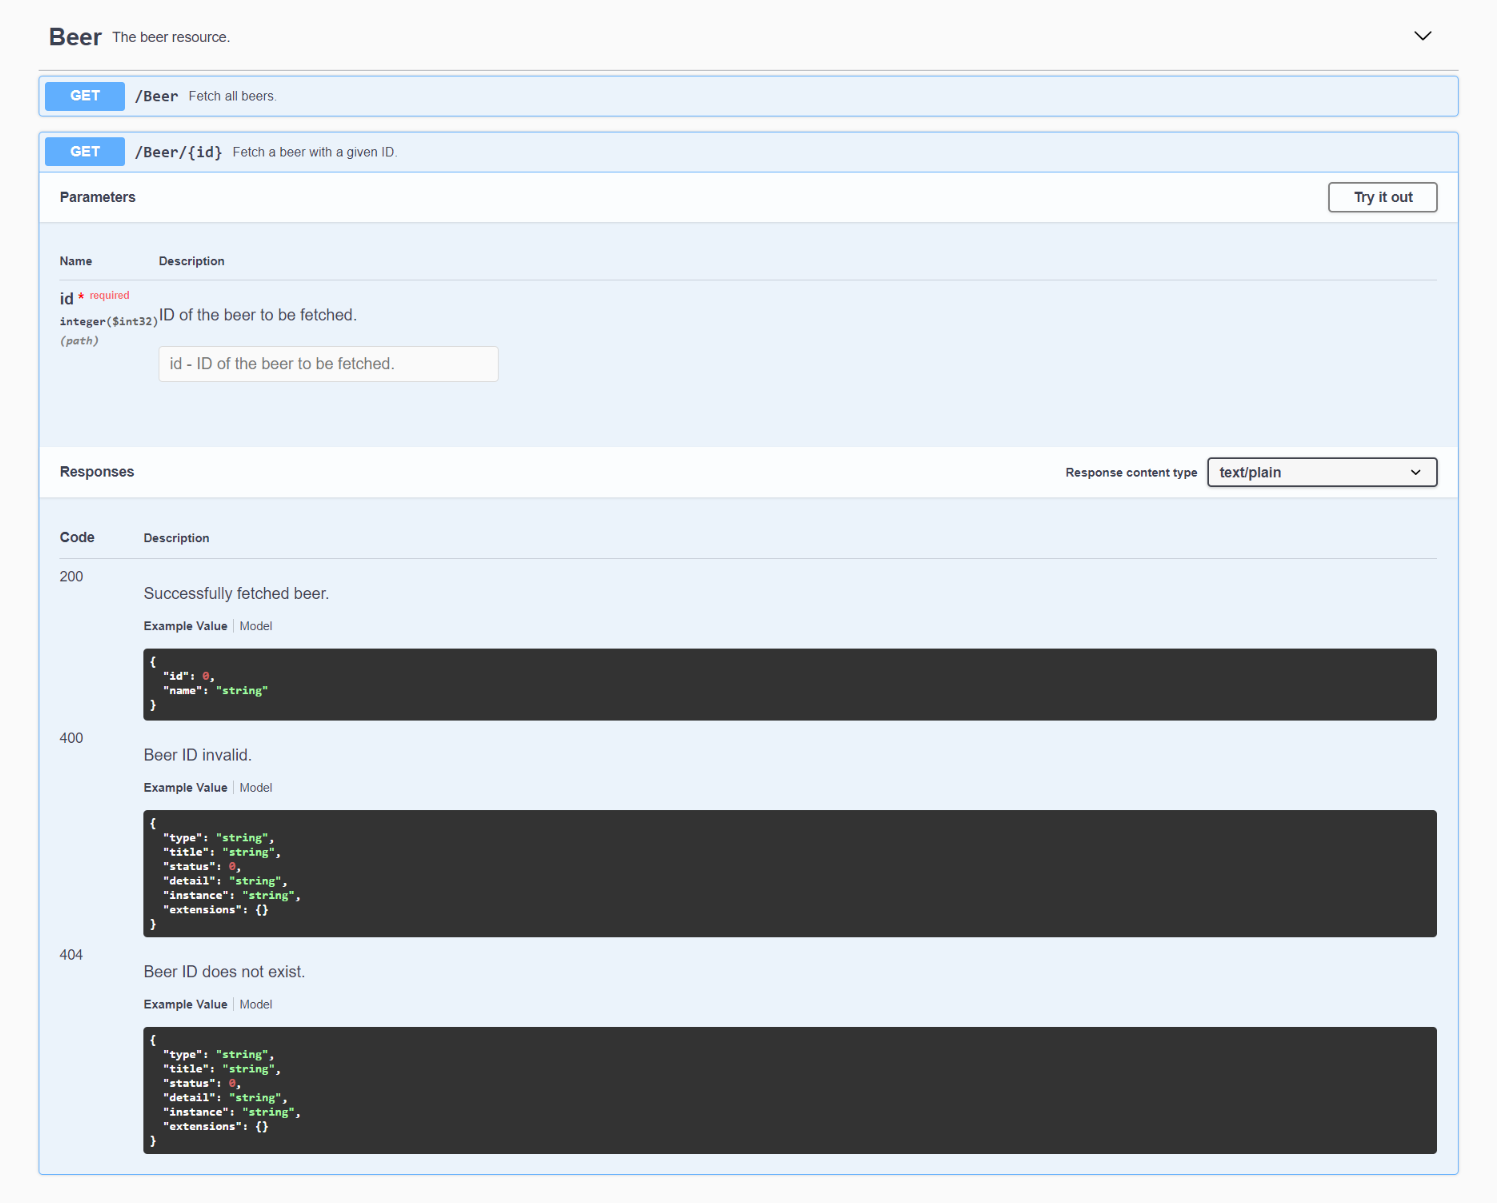
We use XML documentation in our BeerController methods to add function and parameter descriptions under <summary> and <param>, respectively. Response descriptions are added through the use of the <response> XML documentation and the ProducesResponseType attribute.
The following shows how documentation is done for the GET /beer/{beerId} method:
/// <summary>
/// Fetch a beer with a given ID.
/// </summary>
/// <param name="id">ID of the beer to be fetched.</param>
/// <response code="200">Successfully fetched beer.</response>
/// <response code="400">Beer ID invalid.</response>
/// <response code="404">Beer ID does not exist.</response>
[HttpGet("{id}")]
[ProducesResponseType(typeof(Beer), StatusCodes.Status200OK)]
[ProducesResponseType(typeof(ProblemDetails), StatusCodes.Status400BadRequest)]
[ProducesResponseType(typeof(ProblemDetails), StatusCodes.Status404NotFound)]
public ActionResult<Beer> GetById([FromRoute]int id)
{
  ...
}
Tags (which is the Controller in ASP.NET’s case) can be described using the OpenApiTag attribute:
[ApiController]
[Route("[controller]")]
[OpenApiTag("Beer", Description = "The beer resource.")]
public class BeerController : ControllerBase
{
  ...
}
NSwag can generate the OpenAPI document through Reflection, thus the ProducesResponseType and OpenApiTag attibutes can be used for the automated documentation immediately. The XML documentation, however, should be generated before NSwag can grab hold of them. For this, add <GenerateDocumentationFile>true</GenerateDocumentationFile> in the HomeBrewed.csproj project file:
<PropertyGroup>
  ...
  <GenerateDocumentationFile>true</GenerateDocumentationFile>
  ...
</PropertyGroup>
Running the project should generate a more descriptive OpenAPI document in /swagger/v1/swagger.json:
"/Beer/{id}": {
  "get": {
    "tags": [
      "Beer"
    ],
    "summary": "Fetch a beer with a given ID.",
    "operationId": "Beer_GetById",
    "parameters": [
      {
        "type": "integer",
        "name": "id",
        "in": "path",
        "required": true,
        "description": "ID of the beer to be fetched.",
        "format": "int32",
        "x-nullable": false
      }
    ],
    "responses": {
      "200": {
        "x-nullable": false,
        "description": "Successfully fetched beer.",
        "schema": {
          "$ref": "#/definitions/Beer"
        }
      },
      "400": {
        "x-nullable": false,
        "description": "Beer ID invalid.",
        "schema": {
          "$ref": "#/definitions/ProblemDetails"
        }
      },
      "404": {
        "x-nullable": false,
        "description": "Beer ID does not exist.",
        "schema": {
          "$ref": "#/definitions/ProblemDetails"
        }
      }
    }
  }
}

...

"tags": [
  {
    "name": "Beer",
    "description": "The beer resource."
  }
]
...
Navigating to /swagger also shows a more intuitive UI where the function and parameter descriptions and multiple response models are provided for the Beer tagged API endpoints:

Post Processing the Generated Document
Post processing the generated OpenAPI document can be done to modify document fields such as its title, description and author information. For example, we can do the following in Startup.ConfigureServices:
services.AddSwaggerDocument(config =>
{
    config.PostProcess = document =>
    {
        document.Info.Version = "1.0.0";
        document.Info.Title = "HomeBrewed";
        document.Info.Description = "A simple ASP.NET Core API application for demonstration purposes of an imaginary beer website.";
        document.Info.Contact = new NSwag.OpenApiContact
        {
            Name = "J. Law. Cordova",
            Email = string.Empty,
            Url = "https://jlawcordova.com"
        };
    };
});
Running the project generates the OpenAPI document with post processing implemented in /swagger/v1/swagger.json:
"info": {
  "title": "HomeBrewed",
  "description": "A simple ASP.NET Core API application for demonstration purposes of an imaginary beer website.",
  "contact": {
    "name": "J. Law. Cordova",
    "url": "https://jlawcordova.com",
    "email": ""
  },
  "version": "1.0.0"
}
which translates into the Swagger UI in /swagger showing our document metadata:

Conclusion
NSwag provides the tooling necessary to generate OpenAPI documents and the Swagger UI. This tooling allows us to quickly create code-first API documentation for ASP.NET Core API projects.